

How to create, edit, and format images in Excel - suttonthervill
How do we add geometric shapes in Excel, and can they be custom-designed? Surpass provides over 16 dozen geometric shapes that you can size and pull strings to your specific needs, plus hundreds of special effects to customize those shapes. Additional shapes are useable in the form of icons, pictures, or 3D Models, all of which tush be sized, manipulated, and tradition-studied.
Insert Shapes, Icons, Pictures, & 3D Models
1. For Shapes, select Enter > Illustrations > Shapes and opt one from the drop-down name.
2. For Icons, select INSERT > Illustrations > Icons and choose peerless from the huge drop-down submenu, which is organized by category.
3. Shapes and icons are also obtainable as online pictures. SelectSlip in > Illustrations > Online Pictures and type Icons or Shapes in the search box, then press Enter. Turn up the shape or icon you indigence, click once to highlight, then click the Insert button.
4. The best shapes are under INSERT > Illustrations > 3D Models. The sizing and manipulation options for the 3D Models are amazing! You can change the X, Y, or Z Rotary motion, change the Camera View for the X, Y, and Z Position or Look-at-Point; or you can select a triad-dimensional view from a list of preset options.
NOTE: When you select Shapes, atomic number 3 presently as you click the same you want, Excel inserts the drawing crosshair into your spreadsheet, which then requires you to hold depressed the left mouse button and drag on down and ended to "draw" the shape. With the else INSERT> Illustrations (Icons, Online Pictures, 3d Models, etc.), Excel provides a graphical submenu for you to take from the mental image library. Erstwhile you click the image you want, you must then click the Insert button for the image to come out on the spreadsheet.
Insert Shapes, Icons, Pictures, operating theater 3D Models
Sizing the Illustrations
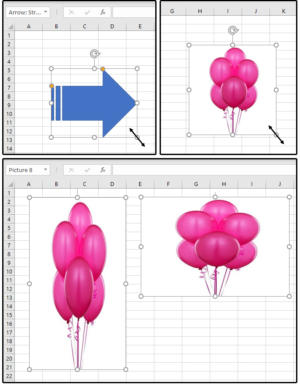
1. Size the illustrations is a acquainted with mental process that you have likely used in otherwise programs. Afterwards you insert a shape, ikon, picture, or 3D model, find the four circles (called image "handles") in the four corners, summation the circles located at the middle top and bottom, and some sides.
2. Place your cursor on single of the circles (e.g., bottom right), hold bolt down the nigh mouse button and press down on and concluded to enlarge the image; OR drag up and to the left to reduce it. Those are just suggestions. You dismiss drag finished or down, leftover surgery right, based on whatever feels cosy to you and produces the desired effect.
NOTE: Use the quoin circles/handles to size the image proportionally. Use the mid-overstep, middle bottom, mid-left, or mid-right circles to distort the double. For example, if you use the top or bottom middle circle, the image gets shorter and wider (or fatter). If you use the middle-side circles, the image stretches thirster and diluent.
 JD Sartain / IDG Worldwide
 02 Size or falsify the illustrations using the picture handles
Redaction the Illustrations
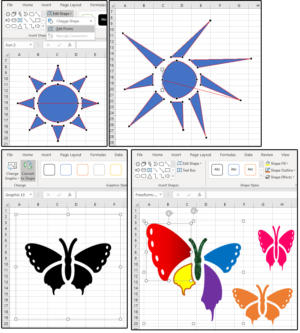
1. When you insert a Shape into an Excel spreadsheet, the DRAWING TOOLS tab appears as long arsenic the Supreme Headquarters Allied Powers Europe is designated. Select Edit Shape (in the first loge on the Medallion Menu), then flick Blue-pencil Points. Notice that Excel adds editing points all all over the selected image.
2. Clink the points (one at a prison term) to modify the envision and see your results.
3. You can also edit the icons. Insert one from the library (e.g., a coquette). In its current form, all you can do is size it, distort it, operating room make IT each one color, unrivalled pattern, Beaver State one slope, with operating theater without an outline.
4. To edit an icon, select information technology. Notice that a newfangled GRAPHIC TOOLS tab appears, with a FORMAT check beneath IT displaying the Data formatting Ribbon menu. Click the Convert to Configuration button. In the popup menu that asks: ". . . Do you want to convert it to a Microsoft Draftsmanship object?" click the Yes button.
5. Looks like zip changed, only it did. Hold down the Ctrl key and detent one of the coquette's wings. Notice that all the pieces of the butterfly tail atomic number 4 individually selected, modified (as in stretched, squeezed, revolved, etc.). You can too sum up variant colors, patterns, gradients, lines, and special personal effects to from each one several piece of the butterfly; that is, four wings and its body.
 JD Sartain / IDG Intercontinental
 03 Editing the Illustrations
Custom Formatting/designing the Illustrations
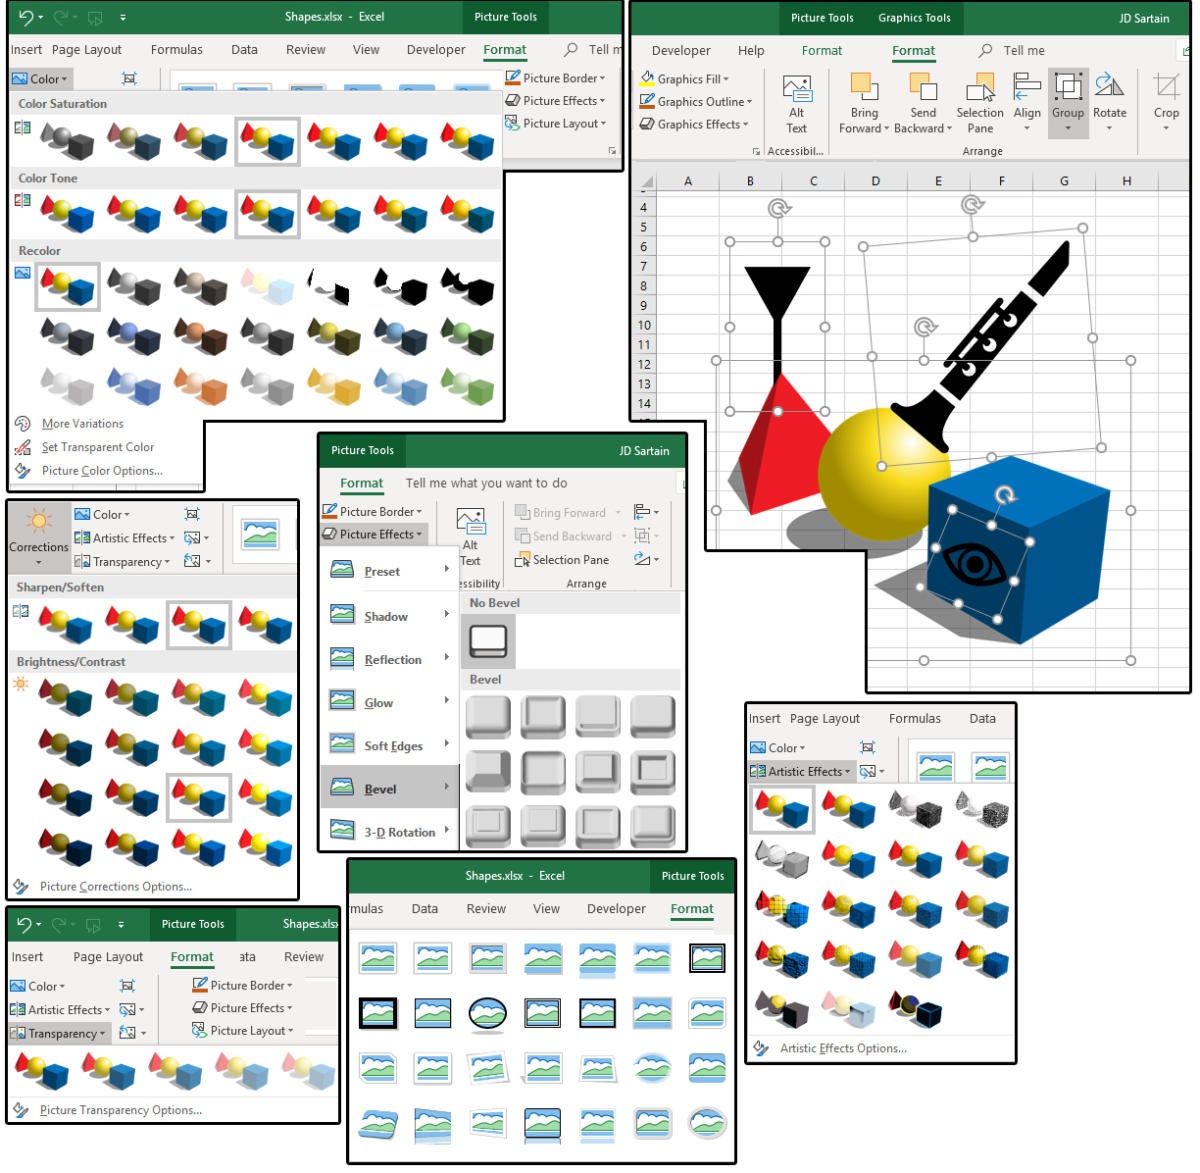
1. In Excel, the term for custom-designing the attributes of an image is known as formatting. When an image is selected, the FORMAT tab key appears, showing all the formatting options and features for that peculiar image.
2. Formatting in Surpass includes Color, Artistic Effects, Transparency, Styles, Borders, seven Picture Effects (with lots of custom operating theatre preset features in each Effect), and Envision Layouts.
3. You can also practice Color Corrections and Remove the Background of an image that contains much just the "floating" object.
4. Eastern Samoa mentioned above, images can be flipped, rotated, armoured, distorted, classified, aligned, planted, or sent forward operating theatre back.
 JD Sartain / IDG World
 04 Usance Formatting the Illustrations
5. The FORMAT tab includes three different sets of tools: Drawing Tools, Picture Tools, and Art Tools. These sub-tabs (even though they appear above the FORMAT tab) are displayed supported on the object selected—Illustrations, Pictures, or Graphics.
6. Load some images and experimentation with the data format options until you palpate homely with the different menus.
 JD Sartain / IDG Worldwide
 05 Drawing Tools, See Tools, Art Tools menus

Source: https://www.pcworld.com/article/403576/how-to-create-edit-and-format-images-in-excel.html
Posted by: suttonthervill.blogspot.com
0 Response to "How to create, edit, and format images in Excel - suttonthervill"
Post a Comment